Customizing the checkout experience with our data-driven API
You can toggle/pass in the following information when you are installing the checkout on your webpage via our data-attribute approach:
- Pre-selecting an item (and therefore not show the item selection page)
- Force a specific language
- Pass in names & email addresses of the purchaser / recipient
- Take the purchaser straight to a specific page on the checkout (e.g. the payment page)
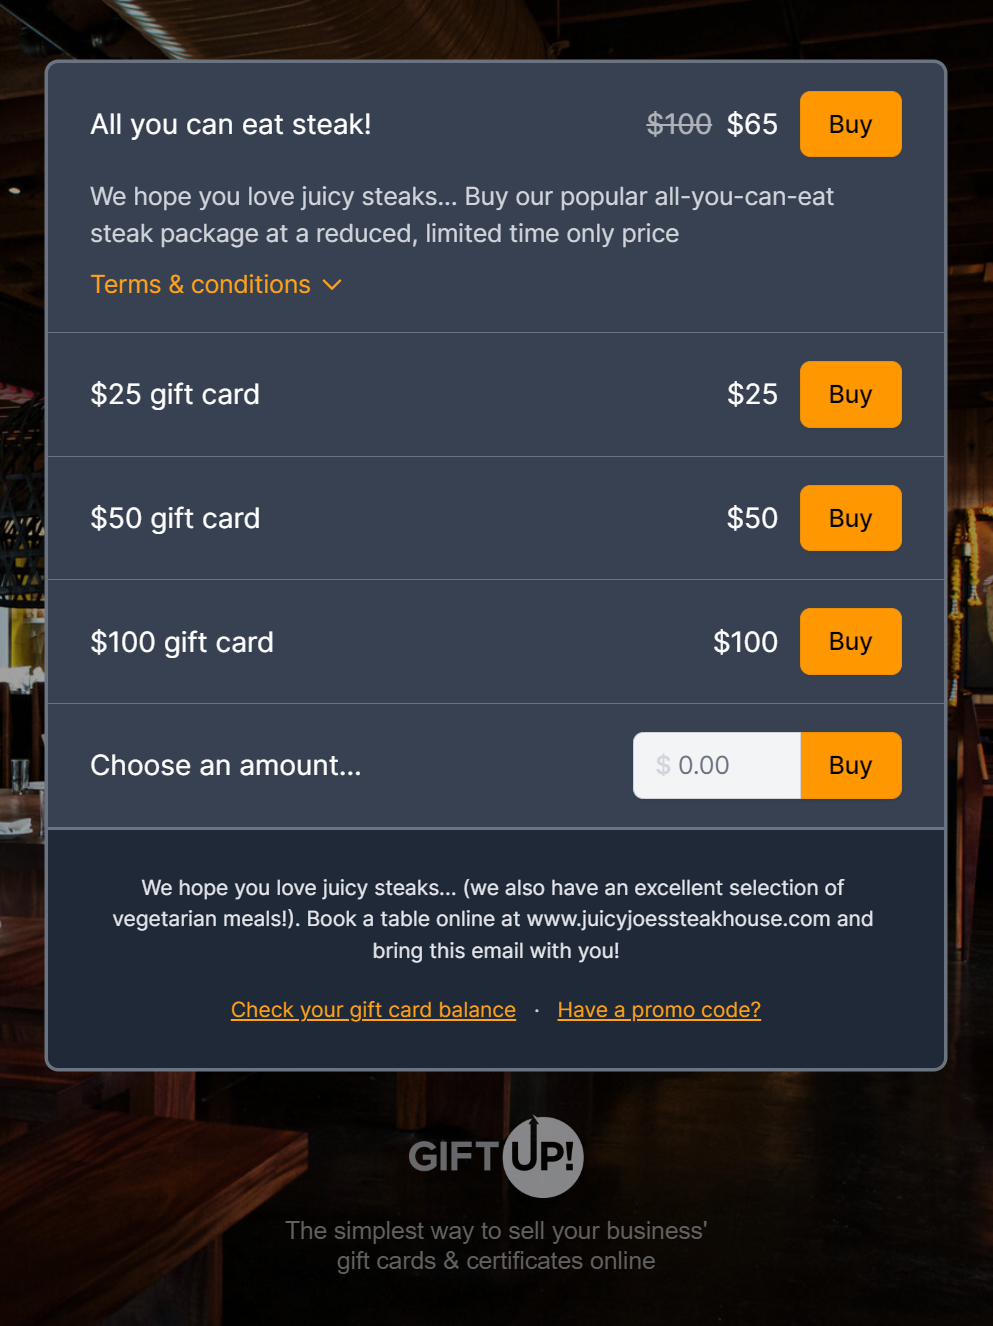
- Hiding the artwork shown at the top, certain items, groups or the custom value gift cards for a more concise checkout experience
- Removing Google Fonts
- Provider referrer information
By default, the installation target DIV looks like this:
<div data-site-id="{YOUR GIFT UP ID}"></div>
Allowing only 1 pre-selected item to be bought
When you want to show a version of your checkout without the first page (the item selection page), just use our configuration widget in the Installation section of the dashboard:
data-custom-value-amount.
Forcing a specific language
We support a language chooser on our checkout, but sometimes you want to install a version of the checkout and have it select a language.
You can do this by passing in a data attribute called data-language and setting it to one of the following values
en-US(United States)en-GB(British)en-CA(Canadian)en-AU(Australian)bg-BG(Bulgarian)hr-HR(Croatian)cs-CZ(Czech)da-DK(Danish)nl-NL(Dutch)fi-FI(Finnish)fr-FR(French)de-DE(German)hu-HU(Hungarian)it-IT(Italian)no-NO(Norwegian)pt-PT(Portuguese)pl-PL(Polish)ro-RO(Romanian)ru-RU(Russian)sr-BA(Serbian)sk-SK(Slovakian)es-ES(Spanish)sv-SE(Swedish)uk-UA(Ukrainian)lv-LV(Latvian)
<div data-site-id="{YOUR GIFT UP ID}" data-language="fr-FR"></div>
Passing in the purchaser's/recipient's name & email address
Our checkout asks for various bits of information, including:
- Purchaser's name & email address
- Recipient's name & email address
- The message added to the gift card
These values can be passed in via the following data attributes: data-purchaser-name, data-purchaser-email, data-recipient-name, data-recipient-email and data-optional-message
You do NOT need to specify all values, only what you have. Also, if you specify data-who="yourself" value (below) then you need only specify data-purchaser-name and data-recipient-email values if you have them, all other values are ignored.
<div data-site-id="{YOUR GIFT UP ID}" data-purchaser-name="Lee" data-recipient-name="Alex" data-purchaser-email="lee@giftupapp.com" data-recipient-email="alex@giftupapp.com"></div>
Specifying the buying experience
You can also override the Gift Up account setting for the buying experience by setting data-who-for
It must be one of these values:
- yourself
- someoneelse
- onlyme
- onlysomeoneelse
This pre-selects (or hides) the following choice:

<div data-site-id="{YOUR GIFT UP ID}" data-who-for="someoneelse"></div>
Applying a promo code by default
If you're running a promotion that is activated by a code, you can automatically apply it by passing in data-promo-code
<div data-site-id="{YOUR GIFT UP ID}" data-promo-code="BLACKFRIDAY"></div>
Selecting the step of the checkout to display by default
If you have all the required information to make a purchase specified by the above data variables, you can skip to any page in the checkout you like. i.e. take the purchaser straight to the payment page by default.
To do this by supplying data-step and providing one of three values: items (the default), details or payment to take the user straight to either the item selection page, the details capture page or the payment page.
<div data-site-id="{YOUR GIFT UP ID}" data-purchaser-name="Lee" data-recipient-name="Alex" data-purchaser-email="lee@giftup.com" data-recipient-email="alex@giftup.com" data-step="payment"></div>
You do not need to worry about missing purchaser/recipient data. We handle this case and ensure we only take the purchaser to the step you direct us if the previous steps have had all the required data passed in also.
i.e. we won't take the purchaser to the payment page, if the details page data is incomplete. In that case, we'll take the purchaser to the details page to complete the required information.
Hiding the artwork
If you prefer to not have your artwork shown, you can pass in data-hide-artwork="true"
<div data-site-id="{YOUR GIFT UP ID}" data-hide-artwork="true"></div>
Hiding Google Fonts
data-hide-google-fonts="true".
<div data-site-id="{YOUR GIFT UP ID}" data-hide-google-fonts="true"></div>
Providing referrer information
<div data-referrer="Marketing website 2"></div>
If you are using our hosted checkout
You can pass in all the above information into our hosted checkout via extra query string parameters instead. Here's a list of supported parameters in our hosted checkout:
productidgroupidwhoforpurchaseremailpurchasernamerecipientemailrecipientnameoptionalmessagesteplanguagepromocodehideartworkhidegroupshideungroupeditemscustomvalueamounthidegooglefontsreferrer
The values and behaviour are as per the above instructions, the only difference is the way you pass them into the checkout.
You can get your hosted checkout URL from the installation section in the dashboard.
You will notice that the hosted checkout includes some information in the header, like company name/logo etc… You can turn this off by adding a query string parameter: justshowcheckout=true. This is great is you are embedding our hosted checkout into your app.